How To Add Capcut Overlays: Step-By-Step Guide 2024
The term “overlay” refers to one of the capabilities of a photograph or video that enables it to overlap with other elements in the same frame or screen. This can be accomplished by using the overlays for capcut features. These features are usually built into versions of video editing software made for mobile devices and portable media players.
The term “overlay” refers to one of the capabilities of a photograph or video that enables it to overlap with other elements in the same frame or screen. This can be accomplished by using the overlays for capcut features. These features are usually built into versions of video editing software made for mobile devices and portable media players.

Capcut overlay function can be utilized in various situations and environments thanks to its adaptability. You could, for example, include watermarks or stickers in the video; add additional video effects; edit videos using a green screen; create text captions for videos; and so on with overlays for edits capcut
It’s just that some video editing programs don’t have an overlay function like other programs do. You are mistaken if you believe that the only way to access this overlay capcut feature is by purchasing a premium version of a video editing app. This functionality is not included in the paid versions of the InShot or FilmoraGo apps.
CapCut Overlay video vs. green screen: what’s the difference?
The CapCut green screen feature should not be confused with the ability to add overlays to videos. An example of the video editing technique known as “overlaying” is the addition of a new layer consisting of text, images, stickers, or even adding videos on top of an existing one. This technique is commonly used in the fields of streaming and content creation (a typical example of this technique is the “pic-in-pic” video).
On the other hand, the green screen feature of CapCut allows users to change the background of a video while maintaining a moving object in the foreground of the frame.
Remember that we’ll be focusing on video overlay capcut in this guide. However, if you want to know how to do a green screen, overlay video in CapCut green/black screen, or otherwise modify your video’s background, then you should read our tutorial on:
• You will be instructed on how to add a background on CapCut, as well as the various methods by which you can use CapCut to add a background to a variety of videos, either with or without the use of the green screen.
• How to use CapCut’s green screen feature, which lets you change a video’s background or add moving objects on top of an existing video.
free overlays for capcutHow To Add Overlay On Capcut
The abundantly featured CapCut app has made it possible to create a wide variety of incredible video effects, most of which were inspired by the most recent trends on TikTok. Some examples of these effects include video velocity edit and photo 3D zoom. TikTok, one of the most popular apps for sharing videos, uses this one as its default video editing program. And in this post, you will learn how to add text, picture, or video overlays by following a detailed guide that explains how to do it in CapCut. The opacity of these overlays can be adjusted as well.

How To Overlay On Capcut : A Step-by-Step Guide
The following is an illustrated guide that will teach you how to use the CapCut app to overlay text, stickers, images, and videos.
You can search for CapCut on either the App Store or Google Play and then download and install it from either of those locations if you don’t already have it installed on your mobile phone. Although this tutorial will focus on using CapCut on a personal computer, the method can also be applied to mobile devices. Gain a better understanding of how to use CapCut on a personal computer.
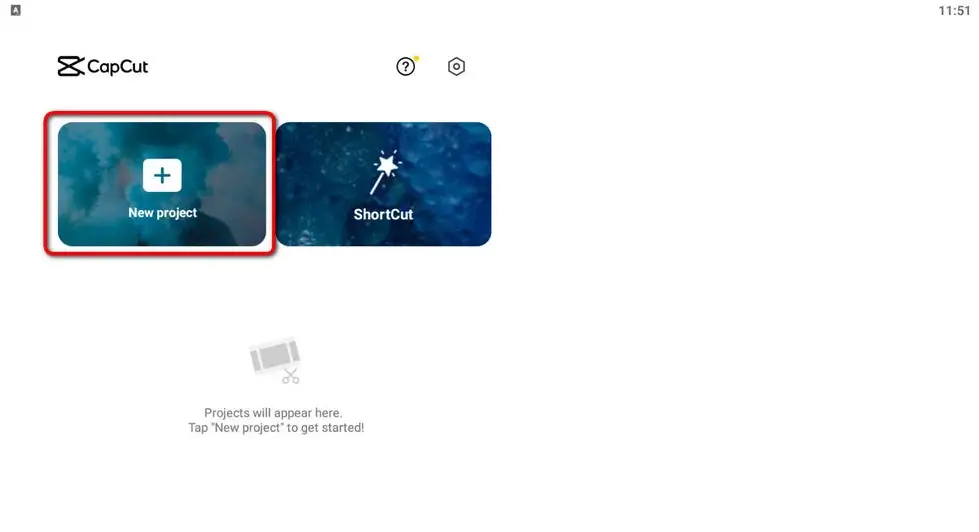
Step1-Open the CapCut application
Launch the CapCut app on your mobile phone to add a video overlay to CapCut. After opening the application, you should initiate a new project and import the media you want to use as the background video.
Step2-Add Different Overlays
When using CapCut Workplace, a lower menu bar provides us with three options to choose from when adding various types of overlays.
• To add a video or photo overlay to an existing video, choose the Overlay button from the menu.
• To add a text overlay to the video that can be customized to your preferences, click the Text button.
• To view the stickers, click the button. Stickers should be integrated into the video. CapCut to give an example, let’s pretend that we want to add a text overlay to create a social media logo.
• To do this, select the Text button from the toolbar

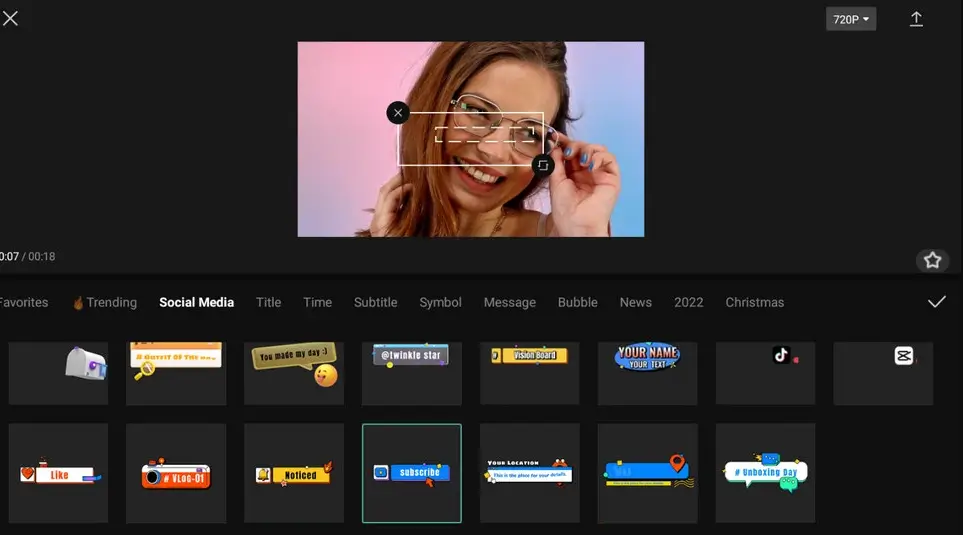
Step3-Select the appropriate text type
You can select text from the following four categories within CapCut: Add text; Text template; Audio captions; and Stickers. Each of these categories has a unique advantage. At this point, we will choose the Text template.
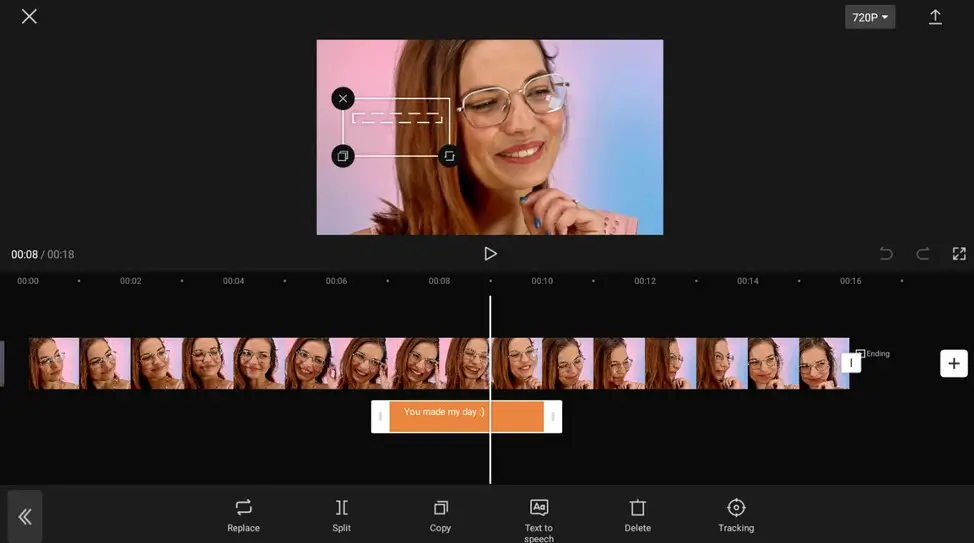
When you’re ready to finish putting the overlay in the timeline, drag the media’s handlebar until the overlay’s length matches that of the background video.
Step4-Add Text to the Template
As you can see, CapCut provides you with a wide variety of fashionable text overlays from which to select; choose the one that best suits your needs.
Step5-Adjust the opacity of the overlay as well as its position
Simply clicking on the newly added text overlay in the timeline will allow you to change its transparency to the desired level. This will enable you to make the overlay either transparent or translucent. You can also adjust the text overlay and move it around using the preview window on top.
When you are ready, click the export button in the top right corner of the screen to save and export the video overlay.
How to overlay the black screen in CapCut
Overlaying in CapCut’s black screen is identical to overlaying in CapCut’s green screen, requiring either the CapCut green screen feature or the CapCut automatically changing background feature. The black screen overlaying in CapCut is precisely the same as the green screen overlaying in CapCut.

Conclusion
One of the primary functions of CapCut is the addition of overlays of any kind, but there are plenty of other capabilities for you to explore. If you want to try CapCut Overlay Free Download but haven’t done so yet, you can get it free from the App Store or Google Play and install it on your device.
And for those who already have CapCut installed, I’m sure you’ve also learned about some of CapCut’s other exciting features; if you want to acquire the skill, follow our tutorials!